Best Birthday Bulletin Board Idea... and it's easy to do!

 Do I have to put up bulletin boards?
I hate doing bulletin boards. Is that blasphemy? I'm in trouble, aren't I... But seriously, they're time consuming and I have to get creative. Ugh. The worst! Haha.
As a middle school teacher, I let myself fall into the "bulletin boards aren't important" camp. I slapped up a title and some related pictures and called it good. Then I started reading more about the importance of classroom layout and using space wisely. As I looked at my room with a critical eye, I realized I wasn't meeting the needs of my students with the bulletin boards I had up. So, with a heavy sigh, I started looking up bulletin board ideas, hoping to find something easy but useful.
Improving my bulletin boards
First, I wanted a bulletin board that displayed the students' birthdays, but it couldn't be too "cutesy" or "girly" since my students are way too cool for school. ;)
Cruising through Pinterest, I found this GREAT idea for a bulletin board. It was exciting, fun, and could be personalized to fit my classroom. Plus, it was easy!
 Materials
1 rectangle tablecloth for background (TIP: buy the rectangle plastic tablecloths from your local party supply store. They're cheap and usually come in a variety of bright colors.)
1 set of borders (local teacher store or search Amazon.com for "classroom decorations" / "teacher borders")
1 set of letters (for the word "Birthdays")
12 pieces of scrapbooking paper (will serve as a border for each month)
construction paper
glue
scissors
Simple Steps
1. Start out by picking out a set of colors that will fit in your room. I went for a black background color so that my brighter colors would pop against it. TIP: A dark background (black) needs brighter colors for the border / foreground (yellows, oranges, pinks, light blues, etc); a light background (yellow) needs darker colors for the border / background (blues, blacks, dark greens, etc).
2. Post your plastic tablecloth to your bulletin board like normal. Since I used cupboard doors for this project (as it can be made smaller than a full size bulletin board), I needed to tape my background to the wood. If adhering to an actual bulletin board, use staples.
3. Put your borders on next with tape (if adhering to wood / wall) or staples (if attaching to cork). While it may seem like borders should go last, I've had to redo boards because my border went further into my bulletin board than I had planned on so it is helpful to get them up before setting up the rest of the board.
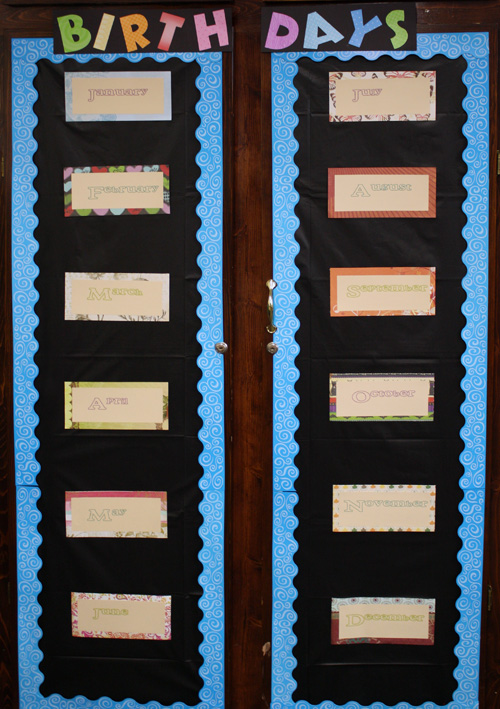
4. Now you're ready to measure out your pieces of paper. I glued the months to a piece of scrapbooking paper to give them a nice border. Then I lined up six on one side of my cupboard and six months on the other (see photo). Be sure there is enough space to put a photo between each month.
5. Background, borders, and months attached! The next part is the personalized part: take a picture of your students (individually or by month) holding the date they were born. Just snap their photo while they hold their number, get the pictures developed, and add them to the board. These pictures get posted under the respective month and serve as a visual reminder for when class birthdays occur.
Such a great way to make your students feel like part of the classroom and can easily be done in the first week! Have fun!