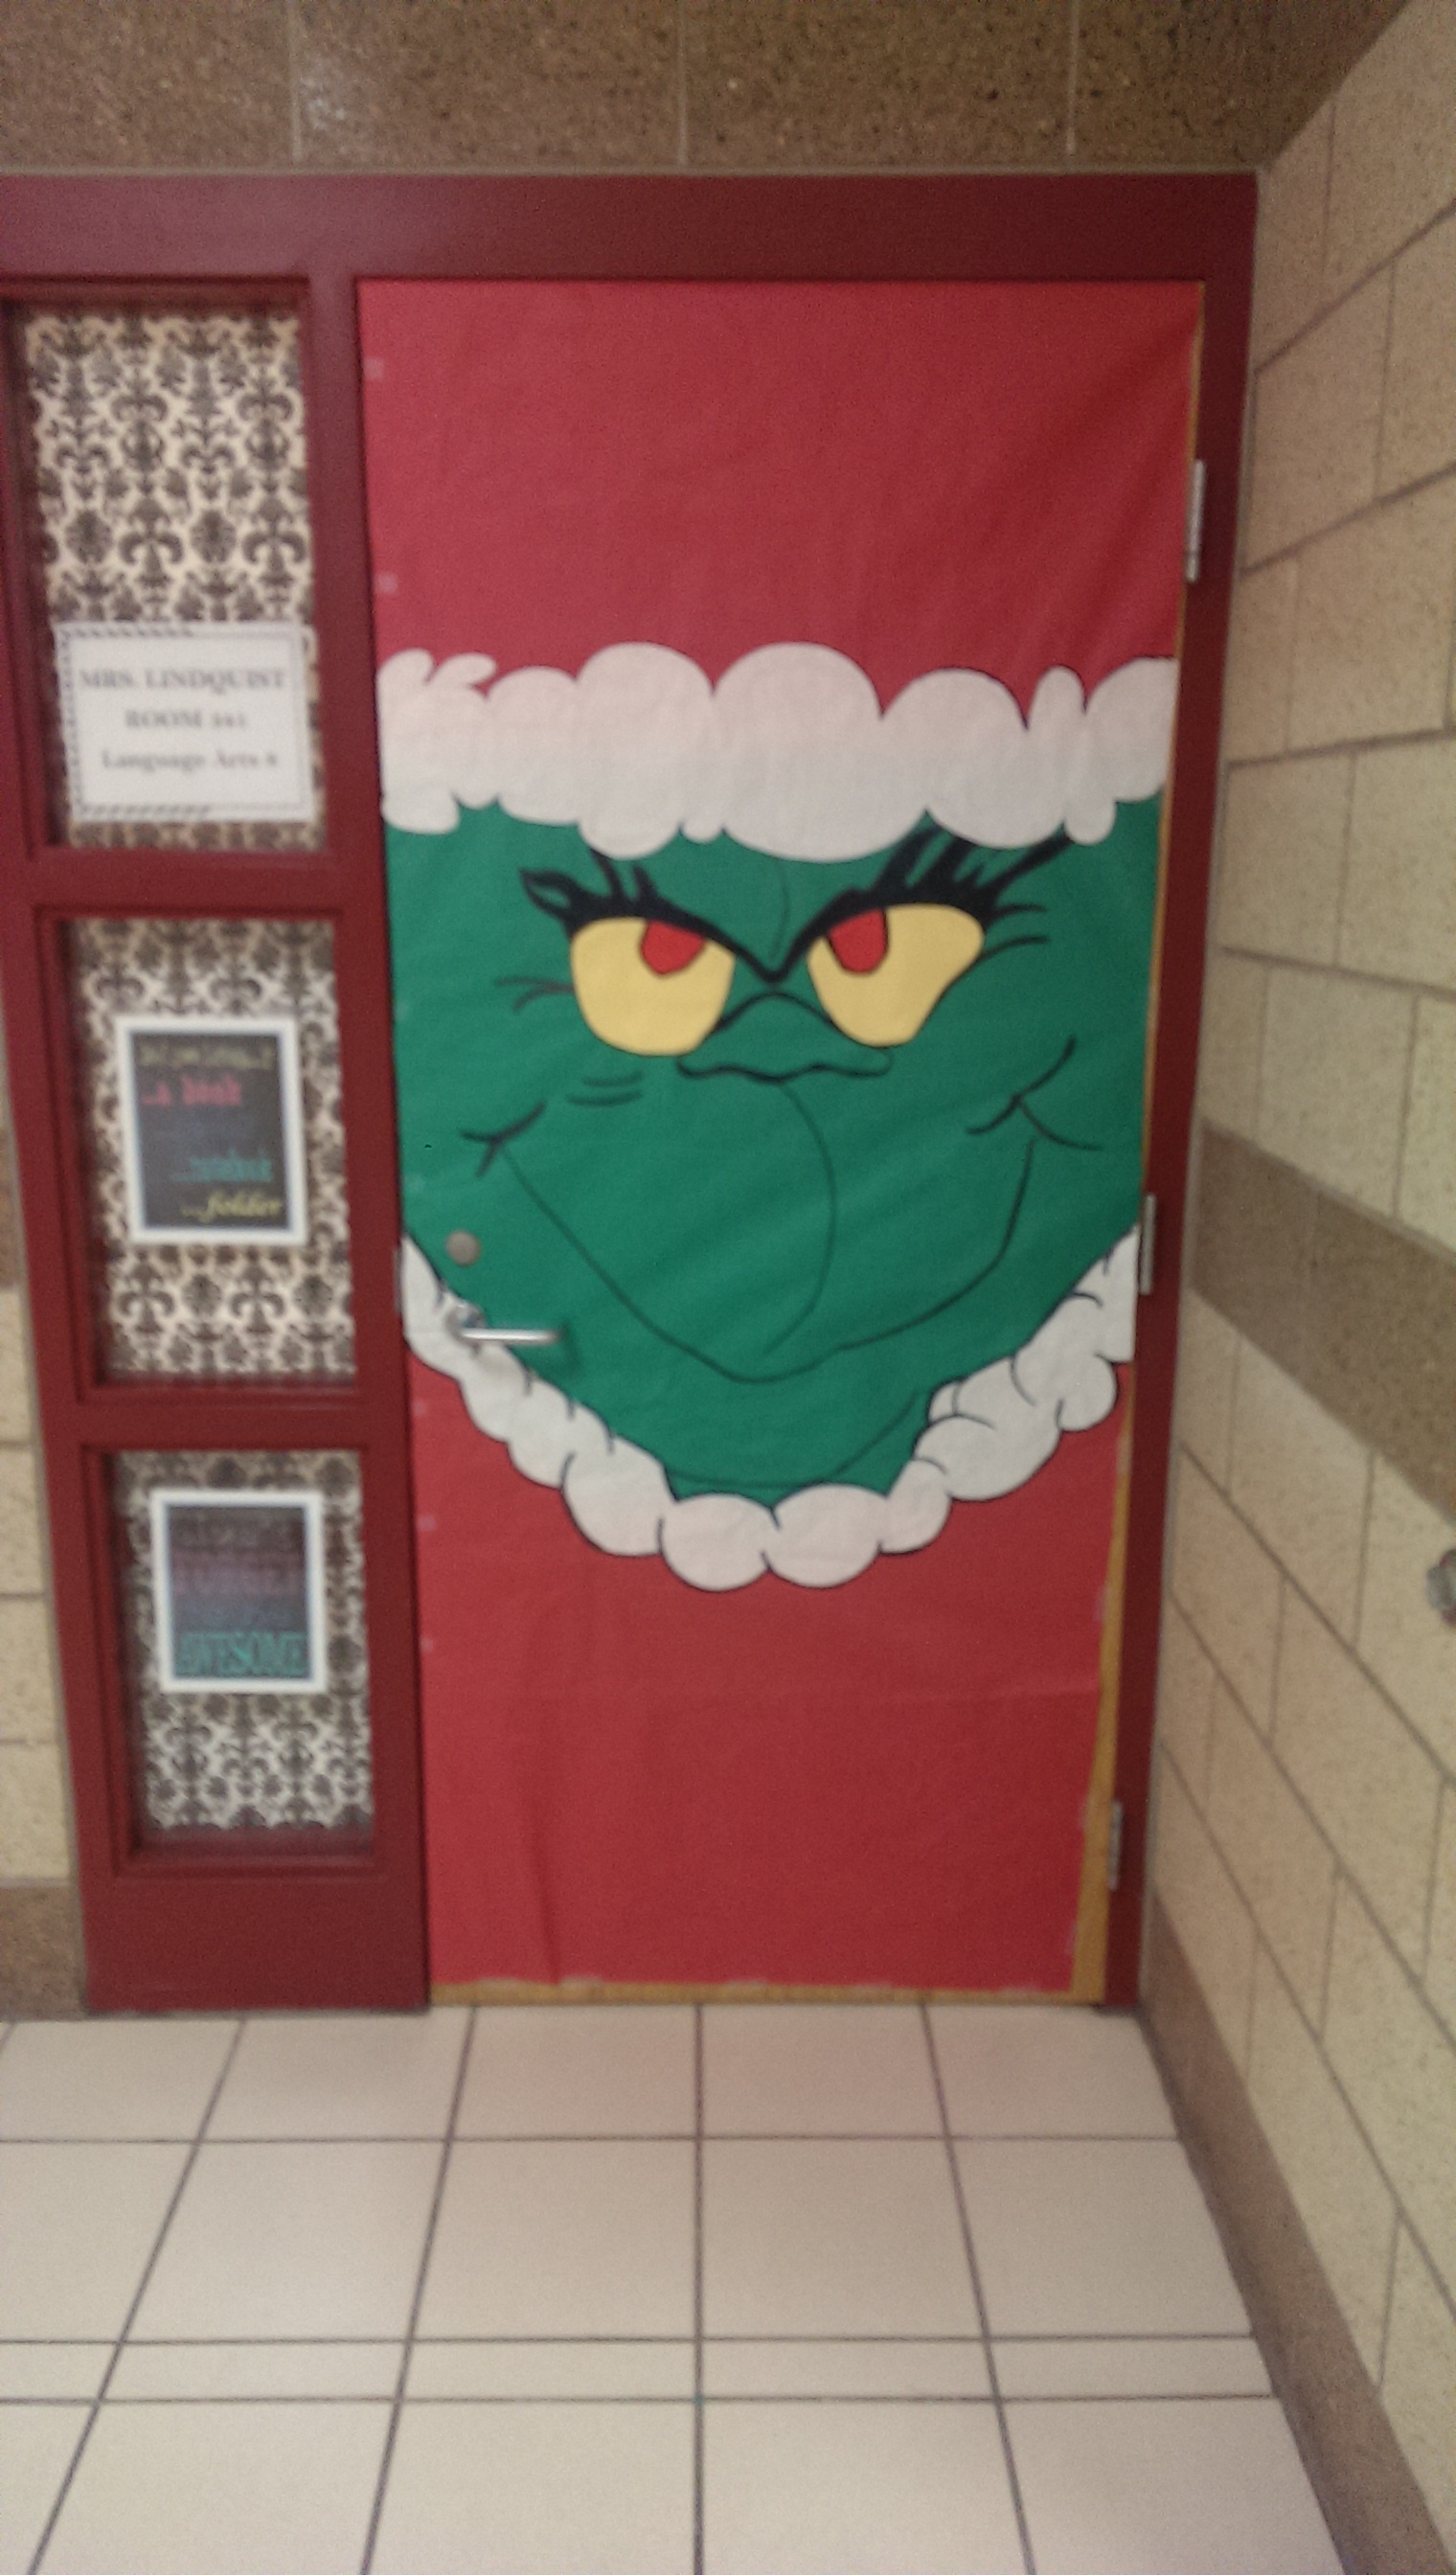
Pinspiration #1: The Grinch Door

 Background:
I had my students respond to to the question “What would your dream classroom be?” on our discussion board. I told them if they came up with realistic ideas, we could try implementing them in our own classroom. They accepted my challenge and came up with a variety of ideas they would like to see.
I read through their suggestions and pulled out the top 15 ideas that kept repeating or seemed feasible. I had to dump ideas like "put candy on the counters so I can eat it whenever I want" as it was not realistic nor conducive (in my opinion anyway) to a good learning environment. I then had them vote using a Google Form to determine which idea they wanted to implement first. One of the top ideas was to decorate the classroom. Hence, the Grinch door!
Bringing The Grinch to "Life":
hopped on Pinterest (oh Pinterest, you are so amazing and take up so much of my time!), and found some holiday themed ideas for the classroom. The first one I wanted to do was create a Grinch door. I showed my homeroom the idea and asked for volunteers. I was able to get about 4-5 of the girls excited about it and they offered up their help.
None of the girls offering their help were confident in their drawing abilities, so I drew everything in pencil and they were responsible for outlining it in black, cutting it out, and gluing it down. They were so excited, they asked if they could come to my room at other times during the day!
Materials:
- Yellow printer paper (pale yellow to goldenrod)
- Red printer paper
- Green butcher paper (the large paper that comes on a roll)
- White butcher paper
- Red butcher paper
- Glue
- Scissors
- Black marker
- Yardstick
Directions:
- Gather Materials - First, we had to gather the materials (see the list above). My students ran down to the art room where our school stores the butcher paper and brought it back for me. It’s so nice that students love running errands!
- Measure the area (e.g. door) where you will post the Grinch - Then, we measured the door and cut the green butcher paper to the width of the door.
- Design the eyes – We started with the yellow eyes. We drew the left eye, cut it out, and used it to size up how big the right eye should be. Once we had the eyes cut out, we added the red pupils. Again, we did one first and then used it to size up the other one.
- Design the Grinch’s face – We glued the eyes down to use as a guide for the rest of the face. Then we drew on his eyebrows, nose, crooked smile, and chin. The process took a couple of days, but the students were very helpful and eager to push get the Grinch door done!
- Create the White “fluff” for the collar and Santa hat – With the face done, we just had to size the white paper to match the green paper and draw the “fluff” that goes on the collar of the Santa suit and hat. Then glue it to the green paper.
- Add red paper to the top and bottom – We matched the size of the red paper to the white and green paper. Then glued it to the top and bottom of our design.
- Finally, we taped our project on the door and stood back to admire our work!
The students are ecstatic with the door design and even want to get it featured in the yearbook. Plus, our door has become the talk of the school with several teachers stopping by daily to check it out. This project combined a variety of skills from art to critical thinking to interpersonal skills. Add to that their renewed ownership of the classroom because they were encouraged to help decorate, and it has been a project well worth the time!
Original Pinterest Post: http://www.pinterest.com/pin/542402348846072034/