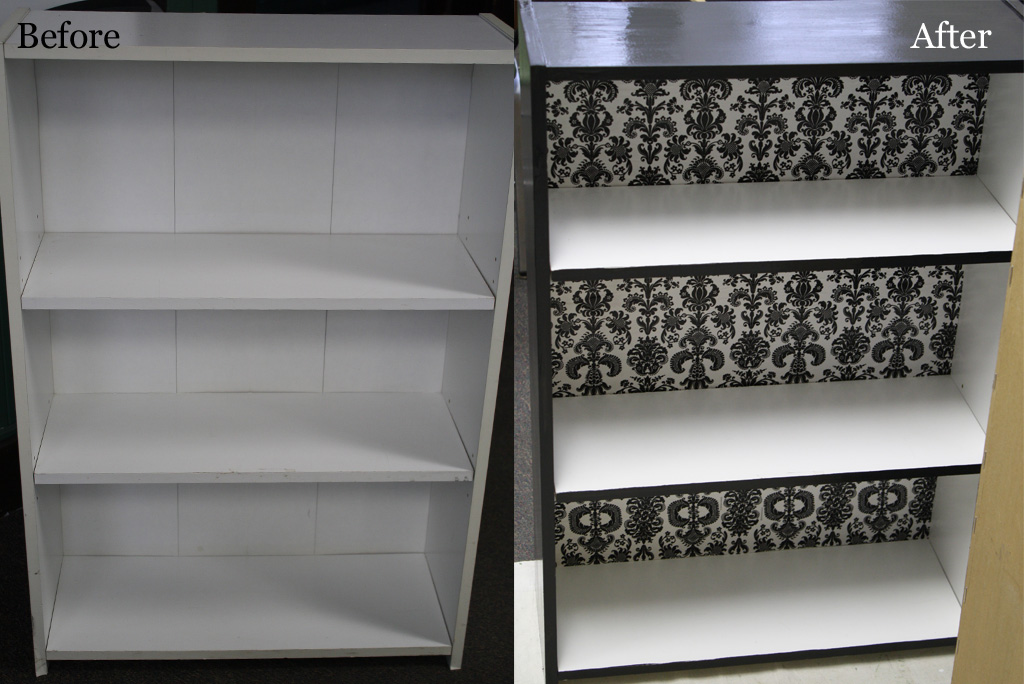
Redo your laminate bookcase and make it something you're actually proud of!

 I searched high and low trying to find the best sources for doing a laminate bookcase makeover. I love DIY projects and couldn't resist the chance to fix up my ugly laminate bookcases in my classroom. I have five of them and they were showing signs of wear, desperately needing to be fixed up.
So, after much research and consultation with the more experienced DIYers, I discovered that I could in fact paint my laminate bookcases and ultimately make them something I am actually proud of. Check it out!
|
|
Materials:
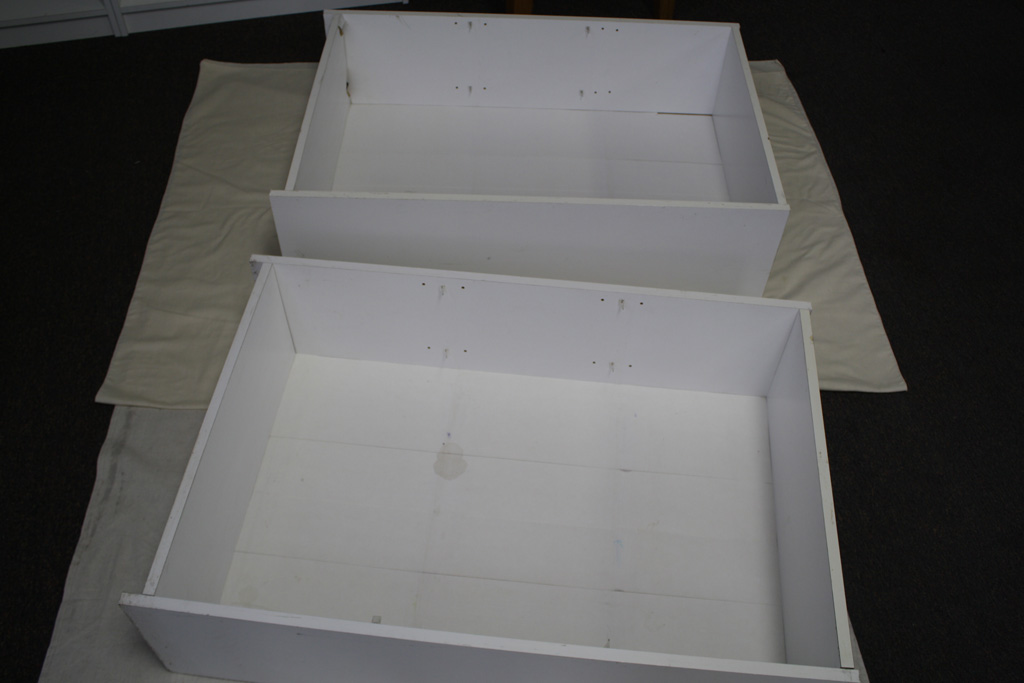
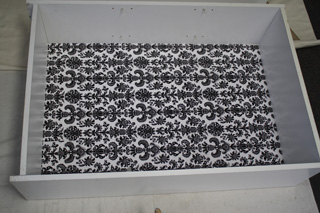
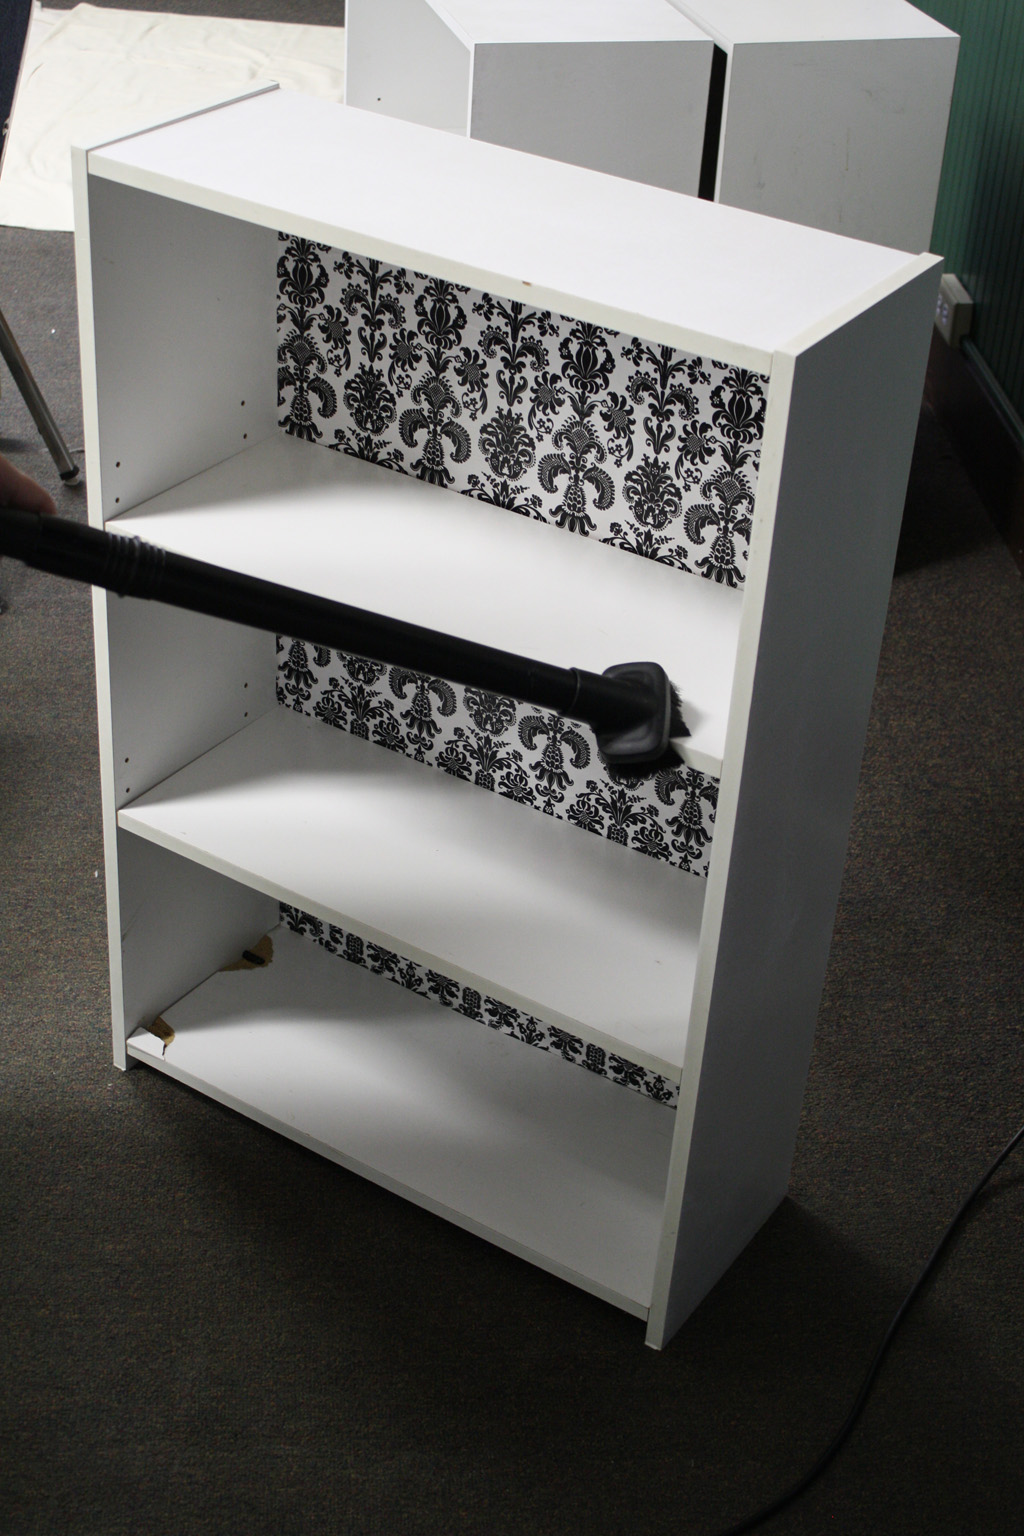
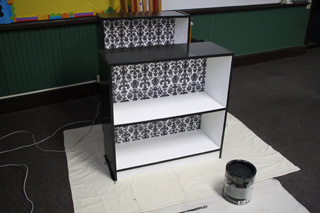
Directions: Step 2 - Take the desired bookcase(s) and remove any shelves and brackets. Store the brackets safely in a plastic baggie (so you don't lose them like I have a tendancy to do). Step 3 - Place the wrapping paper carefully in the bookshelf and create a crease where you need to cut. Carefully cut the wrapping paper so it will fit the back of your bookshelf. Set the wrapping paper aside for now. Step 4 - Sand tops, sides, and front edges of each bookcase to allow the paint to adhere better. Then dust it off or vaccuum it to clear any debris. Step 5 - Mix Elmer's Glue and Water in a bucket. With the bookcase laying on its back, brush the mixture onto inside back of the bookcase and carefully place the wrapping paper inside, watching for any lumps and folds. Allow a few minutes to set. Step 6 - Paint tops, sides, and front edges with primer / paint in one. Step 7 - Allow at least 24 hours (or more if it is in a damp area) for the bookcase to dry completely before putting any books or decorations on it. I love the way my refurbished bookcases look. Bonus: even my middle school students thought they looked "cool." I hope you enjoy your as much as I have enjoyed mine! |